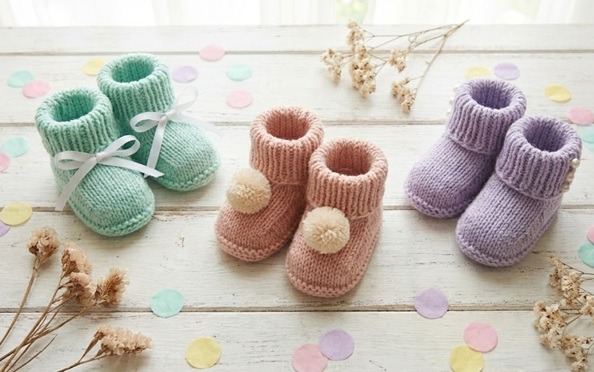
Quick Baby Booties on Your Circular Knitting Machine
Make adorable baby booties in 20 minutes with a circular knitting machine! Easy tutorial for beginners with step-by-step photos. Perfect baby shower gifts that don't require hand-knitting skills!
1/27/202611 min read
This website uses affiliate links. This means if you click on a link and purchase a machine, I may receive a small commission at no extra cost to you. These commissions help support the creator, cover server costs, and keep the lights on so we can keep bringing you more knitting content!
Let's Talk About Those Pinterest-Perfect Baby Booties
Okay, let's be real. We've all been there. You get invited to a baby shower, and you think, "I'll just whip up some adorable handmade baby booties!" Then you remember that hand-knitting those tiny shoes takes approximately 47 hours, three YouTube tutorials, and at least one minor breakdown when you drop a stitch.
Enter the circular knitting machine: your new best friend who doesn't judge you for binge-watching reality TV while cranking out adorable baby gifts.
These baby booties take less than 30 minutes to make. Yes, you read that right. Thirty. Minutes. That's shorter than your average Netflix episode. And they come out looking like you spent all weekend lovingly hand-crafting them (which, let's be honest, is exactly what we want people to think).
Whether you're a crafty mama, a doting auntie, or just someone who needs a baby shower gift by tomorrow (no judgment here), this tutorial is your salvation.
Project Stats:
Time: 20-30 minutes per pair (seriously, I timed it)
Difficulty: Easier than assembling IKEA furniture
Finished Size: 0-6 months (tiny enough to make you say "awww")
Cost: Under $5 in materials (cheaper than that latte you just bought)
Cuteness Factor: Off the charts
Why a Circular Knitting Machine is Your Baby Bootie BFF
Listen, I love grandma as much as the next person, but I don't have her patience for hand-knitting tiny baby items with toothpick-sized needles. If you're nodding along right now, welcome to the club.
A circular knitting machine is like having a tiny robot assistant who actually enjoys repetitive tasks. You crank, it knits. No counting stitches, no accidentally creating a weird lumpy sock-tube hybrid, no crying over dropped stitches at 11 PM.
Plus, once you master baby booties, you can churn these out like a bootie-making factory. Got five baby showers this spring? NO PROBLEM. You'll be the handmade gift hero without the hand cramps.
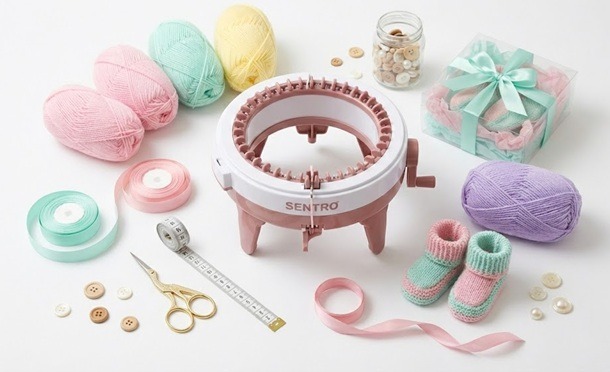
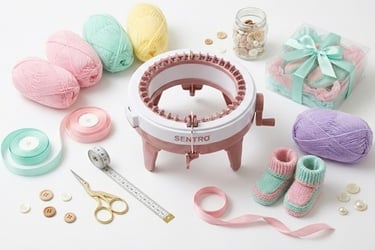
Materials You'll Need (AKA Let's Go Shopping)
The Machine That'll Change Your Life
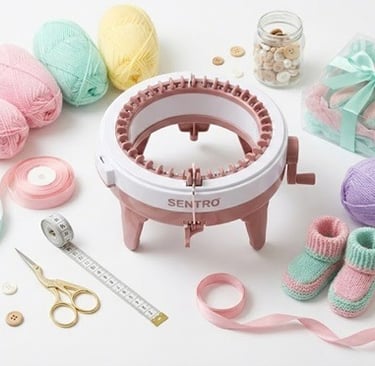
Circular Knitting Machine (22-Needle is Your Goldilocks Size)
For baby booties, you need a 22-needle circular knitting machine. Not too big (that's for adult scarves), not too small (does that even exist?), but juuuust right for teeny tiny baby feet.
My Top Picks:
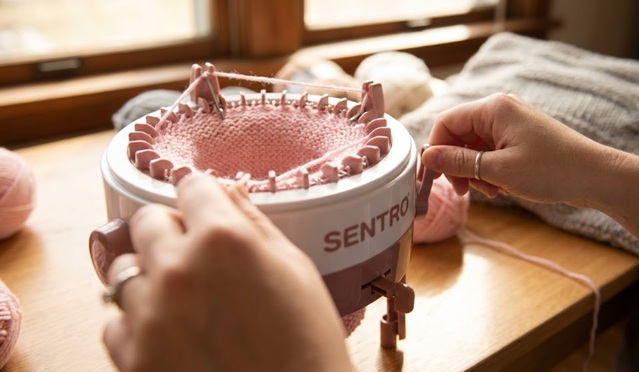
Sentro 22 Needle Knitting Machine - The Overachiever
This is the one I recommend to everyone and their mother (literally)
Easy tension control (because we're not trying to get a PhD in knitting here)
Smooth cranking action (your wrist will thank you)
Perfect bootie circumference every single time
Why I love it: It's basically foolproof, and I am very much a fool sometimes
Addi Express King Size - The Fancy Pants Option
For when you want to feel like a professional
German engineering (ooh la la)
Buttery smooth operation
Worth the splurge if you're going to make 50 million baby items
Real Talk: Don't overthink the machine choice. Any 22-needle circular machine will work. This isn't brain surgery; it's baby booties.
Yarn: Because Babies Deserve Soft Stuff (And So Do Our Hands)
Baby Weight Yarn (Category 3 - Light Weight)
You'll need about 50-70 yards per pair. That's like, barely any yarn. One skein can make multiple pairs, which means MORE GIFTS FOR LESS MONEY. We love efficiency.
The Yarn Hall of Fame:
Bernat Softee Baby Yarn - The Popular Girl
Soft as a baby's bottom (which is the whole point)
Machine washable (because babies are messy little humans)
Hypoallergenic (no angry mom emails for you!)
Comes in 30+ colors (yes, I said THIRTY)
My go-to for literally every baby project
Lion Brand Babysoft Yarn - The Reliable Friend
Affordable AF
Gentle on sensitive baby skin
Doesn't pill after washing (unlike my favorite sweater, RIP)
Caron Simply Soft Baby - The Overachiever
Holds its shape like a champ
Durable enough to survive multiple babies
Great color selection
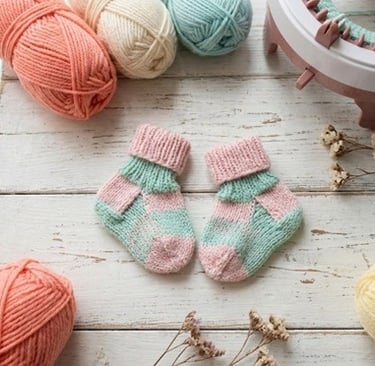
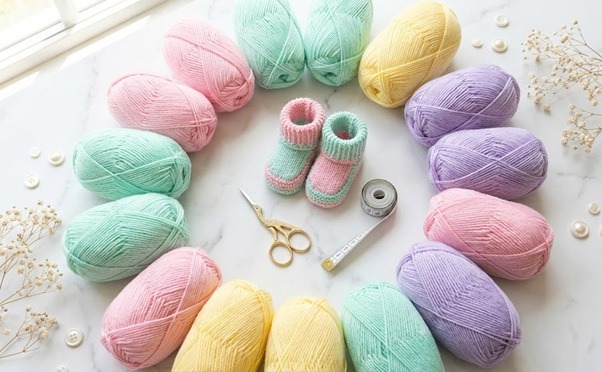
Color Strategy for Maximum "Awww" Factor:
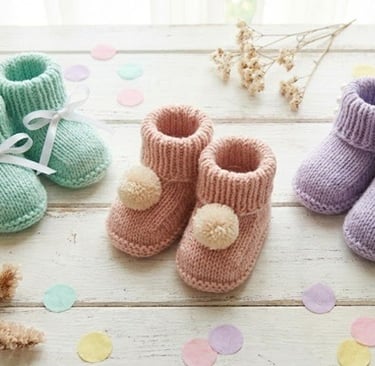
Pastels: Mint, blush pink, baby blue, lavender (classic shower vibes)
Gender-neutral: Cream, gray, yellow, sage green (for when parents are keeping it a surprise or just sick of pink/blue)
Bold & Modern: Mustard, rust, navy, emerald (for the trendy minimalist nurseries)
Variegated: Because sometimes we're too lazy to change colors ourselves
🎨 Pro Move: Grab a baby yarn variety pack and make coordinating sets. Your gift will look like it came from a fancy boutique, not your couch at 10 PM on a Tuesday.
The Supporting Cast (AKA Tools & Cute Stuff)
Essential Tools (Don't Skip These Unless You Enjoy Frustration):
Tapestry needles - Blunt tip so you don't stab yourself
Small sharp scissors - Craft scissors, not your kitchen shears (I see you)
Stitch markers - For counting rounds without using your brain
Measuring tape - Because eyeballing is how we end up with one bootie bigger than the other
Decorative Goodies (This is Where It Gets Fun):
Satin ribbon (⅛" - ¼" width) - Thread through for adorable laces
Tiny buttons - So cute you might die (but sew them on SUPER secure)
Pom-pom maker kit - Toe pom-poms = instant cuteness upgrade
Fabric flowers or bows - Hot glue gun's time to shine
Non-slip puffy paint - Add grips to soles for crawling babies (practical AND cute!)
Step-by-Step Instructions (Let's Make Some Freakin' Booties)
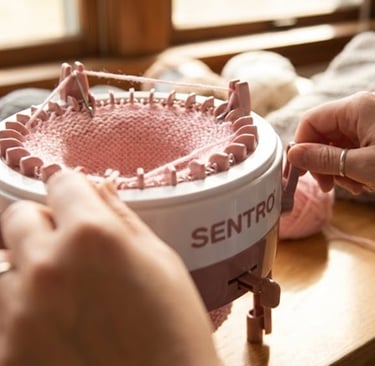
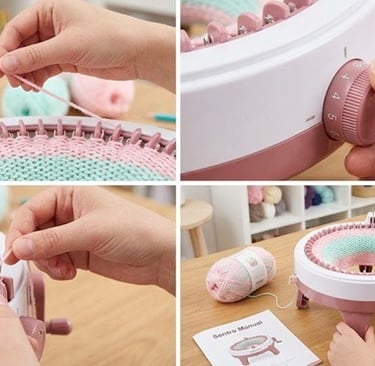
Step 1: Set Up Your Machine Like a Boss (2 minutes)
Set tension to medium (usually dial 3-4 on most machines)
Thread your yarn through the tension guide (follow the little arrows, they're there for a reason)
Cast on using your machine's method (consult the manual if needed, no shame)
Knit 2-3 warm-up rounds to get in the groove
💡 Tension Truth Bomb: Baby yarn is thinner than regular worsted weight, so go a smidge tighter than you think. Loose, floppy booties = booties that fall off baby's feet = sad parents = you look bad. We don't want that.
Step 2: Knit the Ankle Cuff (5 minutes)
This is the part that goes around baby's chubby little ankle. Prepare for cuteness overload.
Knit 10-12 rounds for a fold-over cuff (fancy!)
Want a simpler cuff? Just do 6-8 rounds
Keep your cranking rhythm consistent (I like to put on a podcast and zone out)
Check your work - It should look like a tiny tube. If it looks like a disaster, just rip it out and start over. No one's watching.
Size Guide (Because Babies Come in Different Sizes):
Preemie (tiny humans): 8 rounds
0-3 months (potato phase): 10 rounds
3-6 months (getting chubby): 12 rounds
Step 3: Create the Foot Opening (3 minutes)
Here's where it gets slightly tricky, but I believe in you. This is what transforms your tube into an actual bootie shape.
Stop cranking (hard, I know, the rhythm is addictive)
Manually knit every other needle for 6-8 rows
This means skip a needle, knit a needle, skip, knit, skip, knit
This creates a flat panel that becomes the top of the foot
Resume circular knitting for 2 more rounds to lock it in
Alternative for the "I Don't Wanna Do That" Crowd: Some people just knit the whole thing as a tube and shape it later with strategic sewing. That's valid. You do you, boo.
Step 4: Knit the Foot (8 minutes)
Now we're just cranking away making the actual foot part. This is therapeutic. Put on your favorite trashy TV show and crank.
Continue circular knitting for 8-10 more rounds
Measure as you go - Total foot length should hit about 3.5"
Length Chart (Because Precision Matters... Sort Of):
Preemie: 2.5-3" (itty bitty)
0-3 months: 3-3.5" (still pretty tiny)
3-6 months: 3.5-4" (chunky monkey size)
Step 5: Close the Toe (5 minutes)
Almost done! This is where your tube becomes bootie-shaped.
Method 1: The Gather Method (For When You Just Want It Done)
Cast off using whatever method your machine uses
Thread that tapestry needle with a nice long tail of yarn
Weave through all the loops at the toe end
Pull tight like you're cinching a drawstring bag
Secure with a few stitches and weave in the end (hide your mistakes like a pro)
Method 2: The Flat Seam (For Perfectionists)
Remove from machine but keep loops on waste yarn
Use tapestry needle to create a flat seam across the toe
Creates a flatter toe - better if baby will wear socks under real shoes later
Pick whichever method speaks to your soul. Both work fine.
Step 6: Shape the Heel (3 minutes)
This is the magic step that makes booties actually stay on baby feet (revolutionary, I know).
Fold bootie flat with the foot opening centered on top
Thread your tapestry needle with matching yarn
Stitch the back edge together for about 1 inch
This creates the heel cup - the thing that keeps these bad boys from flying off mid-diaper change
Next-Level Move: Weave some elastic thread into your heel seam. This creates a gentle grip that actually keeps booties on squirmy baby feet. Game changer.
Step 7: Add the Cute Stuff (5-10 minutes of Pure Joy)
This is my favorite part. We're basically playing dress-up with tiny shoes.
The Classic Fold-Over Cuff:
Literally just fold the cuff down once or twice
Looks expensive, costs nothing
My kind of project
Ribbon Laces (Prepare for Compliments):
Thread satin ribbon through the ankle cuff using your tapestry needle
Criss-cross it like real shoe laces (so fancy!)
Tie in a bow at the front
Mom Safety Note: Make sure ribbons are secure and supervise babies under 6 months. We're going for cute, not choking hazard.
Go Wild with Decorations:
Pom-poms: Stick a fluffy yarn pom-pom on each toe (I LIVE for this)
Buttons: Sew a tiny cute button on the side (decorative only - sew that sucker on TIGHT)
Embroidery: Add baby's initials with embroidery floss (now you're just showing off)
Appliques: Hot glue tiny fabric flowers or animals (hot glue gun is the duct tape of crafting)
Let's Get Creative: Variations for Every Vibe
Color Combos That Slap
Ombre Effect: Switch between two coordinating colors every few rounds (looks fancy, is lazy)
Classic Stripes: Change colors every 2-4 rounds (nautical vibes!)
Variegated Yarn: Use self-striping baby yarn and let the yarn do the work (work smarter, not harder)
Monochrome: All white or cream = sophisticated AF
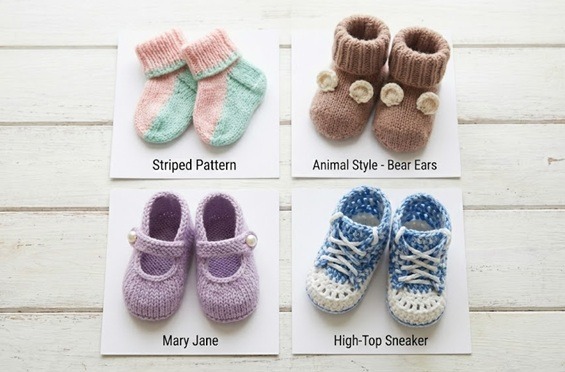
Style Variations (Because Basic is Boring)
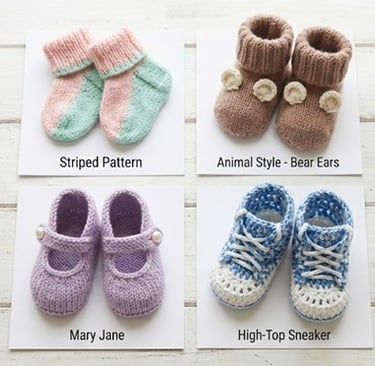
Mary Jane Style Add a button strap across the top. Suddenly your bootie looks like it costs $40 at a boutique.
High-Top Sneaker Vibes Knit the ankle cuff for 20+ rounds, add contrasting color "laces." Street style for babies. Yes, please.
Animal Booties Add felt ears (bunny, bear, fox) and embroider a little face. Use a felt craft kit. Prepare for squealing.
Seasonal Sass
Red/green for Christmas (festive baby!)
Pastels for Easter
Orange/brown for fall
Red/white for Valentine's Day
Sizing Up (For Bigger Humans)
Use the exact same technique, just switch machines:
40-needle machine: 6-12 months (chubby crawler phase)
48-needle machine: 12-18 months or toddler slippers (yes, toddlers need cute footwear too)
Troubleshooting: When Sh*t Goes Wrong
Problem: My booties look like sad, floppy socks
Fix: Crank up that tension dial, sister
Try a smaller needle count machine
Use slightly thicker baby yarn (Category 4 instead of 3)
Problem: Booties keep falling off the baby
Fix: Add elastic thread to the heel seam or ankle cuff
Make the ankle cuff snugger (fewer rounds before starting the foot)
Face it: babies have weirdly small feet. It's not you, it's them.
Problem: The toe looks like a lumpy potato
Fix: Practice your gathering stitch (YouTube is your friend)
Try the flat seam method instead
Honestly, babies don't care. Only you care.
Problem: One bootie is bigger than the other
Fix: Count your rounds, girl! Use stitch markers
Make sure you're using consistent tension
When in doubt, make them both again. It's only 20 minutes.
Problem: My machine is making weird noises/getting stuck
Fix: Check your tension (too tight?)
Make sure yarn is feeding smoothly
Clean your machine (yes, they get linty)
Consult your machine manual (shocking, I know)
Care Instructions (So Your Booties Don't Turn Into Doll Clothes)
Washing (Because Babies are Gross):
Machine wash cold, gentle cycle
Use baby-safe detergent (no harsh chemicals on baby toes)
Throw them in a mesh laundry bag so they don't get eaten by the washing machine
Air dry or tumble dry low
Pro Tip: Make the mom's life easier by including a little care card with your gift. "Machine washable!" are magic words to new parents.
Storage:
Keep pairs together with ribbon or in a small cute box
Store flat so they don't get weird and crunchy
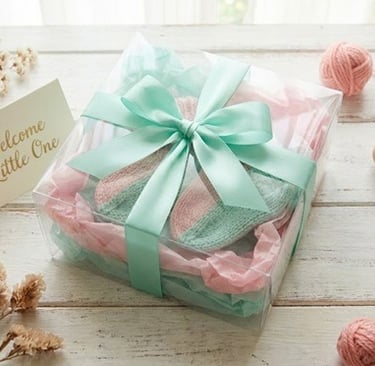
Gift Presentation: Because Presentation is Everything
Let's be honest: half the fun is seeing the mom-to-be's face when she opens your gift.
Baby Shower Flex:
Make 2-3 pairs in different sizes (newborn, 3 months, 6 months)
Package in a clear gift box with ribbon so people can see your handiwork
Add a cute tag: "For baby's first steps!" (even though babies don't walk for like a year, but whatever)
Throw in a matching baby headband or bib (overachiever status: unlocked)
Hospital Gift (For Your Bestie):
Pair booties with a soft swaddle blanket
Add a "Congrats!" card
Use a reusable fabric gift bag (eco-friendly AND cute)
Maybe include coffee. New parents NEED coffee.
The "I'm Sorry I Forgot Until Last Minute" Package:
Booties + coffee/tea for exhausted parents
Quick baby care essentials from Target
Toss in a gift basket to make it look intentional
Shop This Project (Let's Get You Set Up)
The Machine
Sentro 22 Needle Knitting Machine - My ride-or-die for baby projects
Yarn Options (Pick Your Poison)
Bernat Softee Baby Yarn - Single Skein - For testing colors
Baby Yarn Variety Pack - 10 Pastel Colors - For the overachiever making 47 pairs
Luxury Bamboo Baby Yarn - Hypoallergenic fancy pants option
Must-Have Tools
Complete Knitting Tools Set - Needles, scissors, markers, the works
Tapestry Needle Set - Various sizes for different yarn weights
Measuring Tape - Retractable = less annoying
Cute Decoration Supplies
Satin Ribbon Assortment - 20 colors because options
Tiny Button Collection - Adorable variety pack
Pom-Pom Maker Kit - Multiple sizes
Mini Fabric Flowers - Instant glue-on cuteness
Non-Slip Puffy Paint - For practical grippy soles
Gift Presentation Goodies
Clear Gift Boxes with Ribbon - 12 Pack - Stock up!
Baby Shower Gift Bags - Assorted - For when you're too lazy to wrap
Pastel Tissue Paper - Makes everything look fancier
Gift Tags - "Handmade with love" (and Netflix)
Final Thoughts: You Got This, Mama
Listen, if I can make these booties while simultaneously preventing my cat from attacking the yarn and watching The Bachelor, you can DEFINITELY make them.
Baby booties are literally the perfect circular knitting machine project:
Fast (shorter than most TikTok scrolling sessions)
Cheap (less than your morning Starbucks run)
Adorable (scientifically proven to cause "awww" reactions)
Impressive (people will think you're a crafting goddess)
Practical (babies actually need these things)
The best part? Once you nail the basic technique, you can crank out an entire baby shower gift arsenal in one afternoon. Three sizes, coordinating colors, cute packaging—you'll look like Martha Stewart's cool younger sister.
Ready to become the queen of handmade baby gifts?
Grab your circular knitting machine, some ridiculously soft baby yarn, and let's make some bootie magic happen!
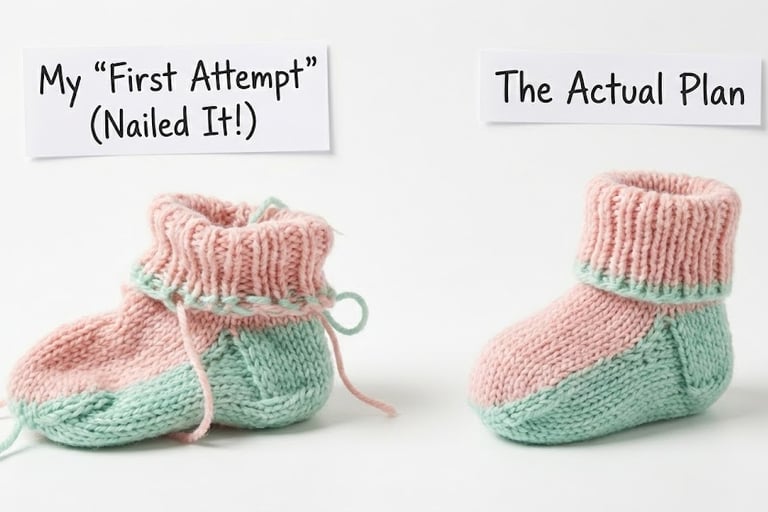
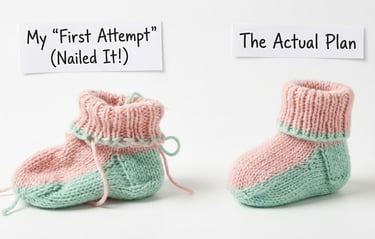
And remember: if your first pair looks a little wonky, that's called "rustic charm." Roll with it. 😉


Contact
hello@crochetmachines.com
© 2025. All rights reserved.